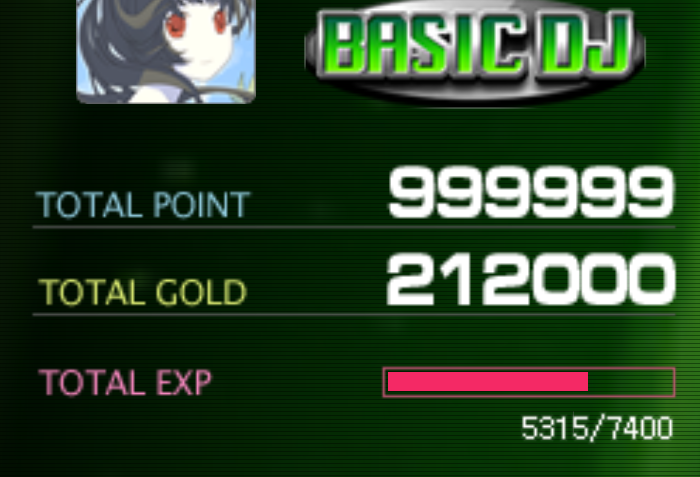
書き換えをミスると2度と復旧できなくなります。失敗しても筆者は責任取れませんので自己責任でお願いします。
DJMAX Trilogyは2013年にオンライン・公式サポートが終了しました。
曲などの解禁にPOINTやGOLDが必要になりますが、特にPOINTについてはオンライン対戦をやらなければ稼げない部分があります。
そのため、不具合でやむを得ずデータをリセットした場合は解禁できない曲が出てきてしまいます。
私も不具合改善のためにDJデータリセットをしてしまったため、どうにかできないかと思い、今回方法を探してみました。
目次
必要なものをダウンロード
以下の2つが必要です。
- djmax-dongletools
- バイナリエディタ(Stirling、xedit等)
djmax-dongletoolsをダウンロード
djmax-dongletoolsは、Trilogyのドングルのデータをバックアップしたり、そのデータを書き込むツールです。コマンドプロンプトで使用します。
dongletools.exeとRCGrandDogW32.dllを任意の場所に保存します。
今回はわかりやすくCドライブ直下にDongleToolsフォルダを作成し、2つのファイルを置きました。 以降の解説もこのフォルダ構成を例に行います。
+ Cドライブ
  + DongleTools
    - dongletools.exe
    - RCGrandDogW32.dll
バイナリエディタをインストール
適当なバイナリエディタをインストールしましょう。
書き換えを実行
流れとしては、
- dongletoolsでドングルのデータを取り出す
- 取り出したデータを念の為バックアップ
- 取り出したデータの必要箇所をバイナリエディタで書き換える
- dongletoolsでドングルに書き込む
といった感じです。
1. ドングルのデータを取り出す
ドングルをPCに刺した状態で、コマンドプロンプトでコマンドを打ちます。
dongletoolsのコマンド説明は以下の通り。
Dongle Information
https://github.com/AerialX/djmax-dongletools#usage README.mdのUSAGEより
Run it withdongletools.exe pto have it print out some useless information - probably a good way to test that it can detect your dongle without actually doing anything dangerous.
Dump Save
Rundongletools.exe dto dump the contents of your Profile Key Dongle to the current directory. It's now up to you to move them into their own backup folder for later restoration.
Upload Save
Rundongletools.exe uto write the dumped files from the current directory to your dongle. That's about it - it will also upload partial dumps in case you only wanted to change one or two files for some reason rather than do a full restore.
Format Save
Rundongletools.exe fto delete all files on your dongle and create an empty save on it. This is about the same as the Reset option in the Trilogy launcher, except it will work even when Trilogy starts rejecting the dongle outright if you've really messed it up. Also this way your MyDocuments/DJMaxTrilogy folder containing all of your highscores isn't deleted. But just in case, don't try this unless you have a backup.
コマンドプロンプトを起動したら、まずcdコマンドでDongleToolsフォルダに移動します。
C:\Users\ユーザー名>cd /D C:\DongleTools
C:\DongleTools>
ここでdongletools.exe pとコマンドを打って、ドングルが認識されているか確認します。シリアルナンバー等が表示されれば問題ないはずです。
C:\DongleTools>dongletools.exe p
Dongle opened
Dongle info retrieved
     Serial Number: xxxxxxxx
     (略)
     Product number: xxxxxxxx
Dongle closed
次に、dongletools.exe dとコマンドを打って、ドングル内のファイルをバックアップします。
C:\DongleTools>dongletools.exe d
Dongle opened
 Password verified and 255 verifications left
 Reading sizes file 3f00/4
         Read file sizes successfully
 Reading file 3f00/0
 (略)
Dongle closed
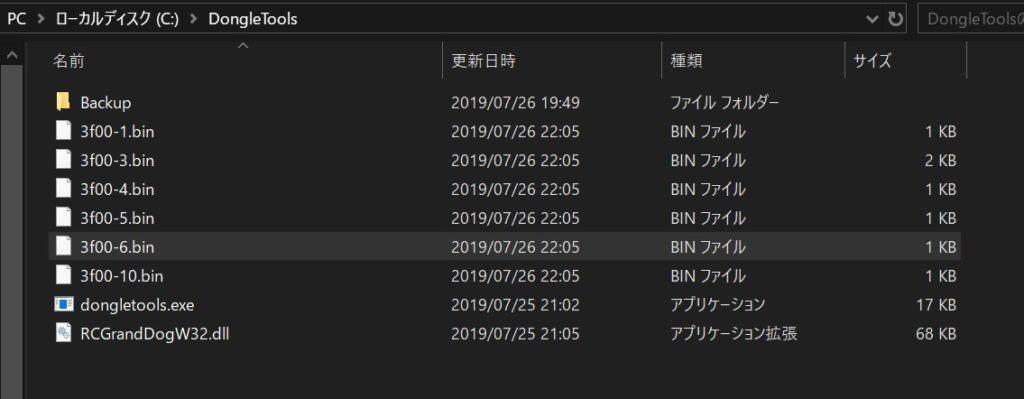
上手くいくと、下の画像のように6つのファイルが出力されます。
2. 取り出したデータをバックアップ
3f00-1.bin~3f00-10.binの6つのファイルを念の為バックアップしておきます。書き換えでミスった場合もバックアップしたものを上書きすればもとに戻せます。
3. データをバイナリエディタで書き換える
いよいよ本題です。
3f00-6.binにPOINT・GOLD・EXPのデータが入っているのでバイナリエディタで編集します。
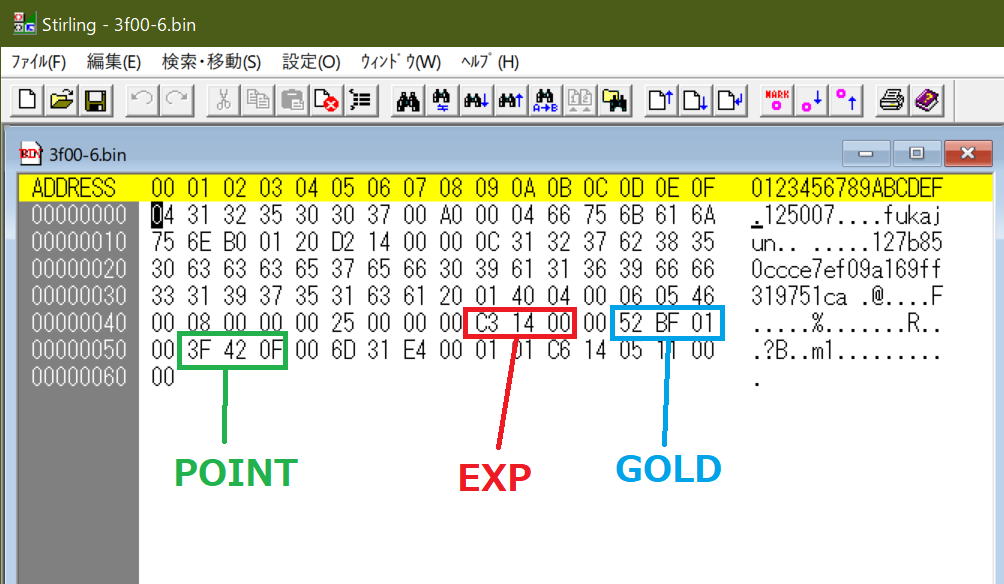
書き換える場所は上の画像の通りです。
書き換え方は、書き換えたい値を10進数から16進数に直し、2桁ごとに分け、並び順を逆にして書き換えます。
例えば、POINTを999,999にする場合、
- 10進数から16進数にする (999,999→F423F)
- 2桁ごとに分割 (F423F→0F 42 3F)
- 並び順を逆にする(0F 42 3F→3F 42 0F)
- バイナリエディタのPOINTの位置に書き込み (上の画像の通りになる)
16進数への変換はWindows10の電卓を使うと便利です。
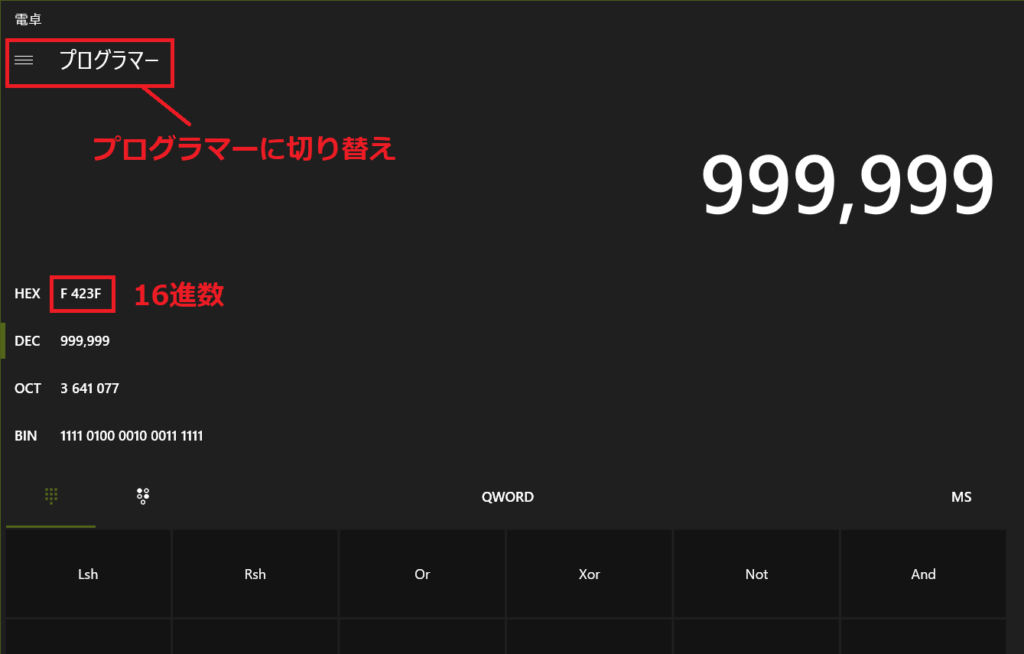
書き換えたら上書き保存します。(必ずバックアップは残しておくこと)
4. ドングルに書き込む
3f00-6.binを書き換えたら、dongletoolsを使って書き込みます。
再びコマンドプロンプトを使い、dongletools.exe uで書き込み開始です。
C:\DongleTools>dongletools.exe u
 Dongle opened
 Password verified and 255 verifications left
 Reading sizes file 3f00/4
         Read file sizes successfully
 Writing file 3f00/0
 (略)
Dongle closed
書き換えが完了したら、ゲームを起動します。GOLDやPOINTなどが書き換えた値になっているはずです。※GOLDについては999,999にしても212,000にしかなりませんでした。EXPの値変更はまだ試してません。
